How to Remove the Background of an Image in Photoshop

Imagine the subject of your photo surrounded by a completely different background — one you’ve designed from the ground-up using your imagination. Before you can place your subject into a completely new landscape, you’ll need to remove the background of the original image first. Background removal is a tricky art and requires more than just the eraser tool, but you don’t have to be a graphic design whiz to learn the steps in Adobe Photoshop CC.
Step 1: Ready Your Tool
First, open your photo in Adobe Photoshop. To remove the background, select the ‘Quick Selection Tool’ from the tools panel. (Don’t see the ‘Quick Selection Tool?’ It may be nested with the ‘Magic Wand Tool’). The ‘Quick Selection Tool’ is the best tool for basic background removals.
Choosing the ‘Quick Selection Tool’ opens a context-sensitive menu at the top of your workspace. Before you begin, select ‘Add to Selection.’ You may need to open the ‘Brush Picker’ and increase or reduce the brush size depending on the size of your photoStep 2: Remove Background Imagery with a Selection
With the tool ready, click and drag your mouse on the unwanted background. A group of marching ants, or selection, will appear and grow as you click and drag. Gradually work around your subject adding to the selection as you go.

Sometimes, you’ll find that some areas are added to your selection that you don’t want to include. Hold down the ‘Alt’ or ‘Option’ key to toggle the subtraction mode for the tool, and then click and drag your mouse around the background area you wish to remove. Release the ‘Alt’ or ‘Option’ key when you’re ready to add to your selection again. Alternate between the addition and subtraction modes as your work.
Zoom-in closer to work tougher areas that include both background and subject. Tip: smaller details like shoestrings, aren’t necessary to include. But reducing your brush to 1px can help capture the smallest details.
Once your subject is completely within a selection, you’re ready to move on.
Step 3: Refine the Edges
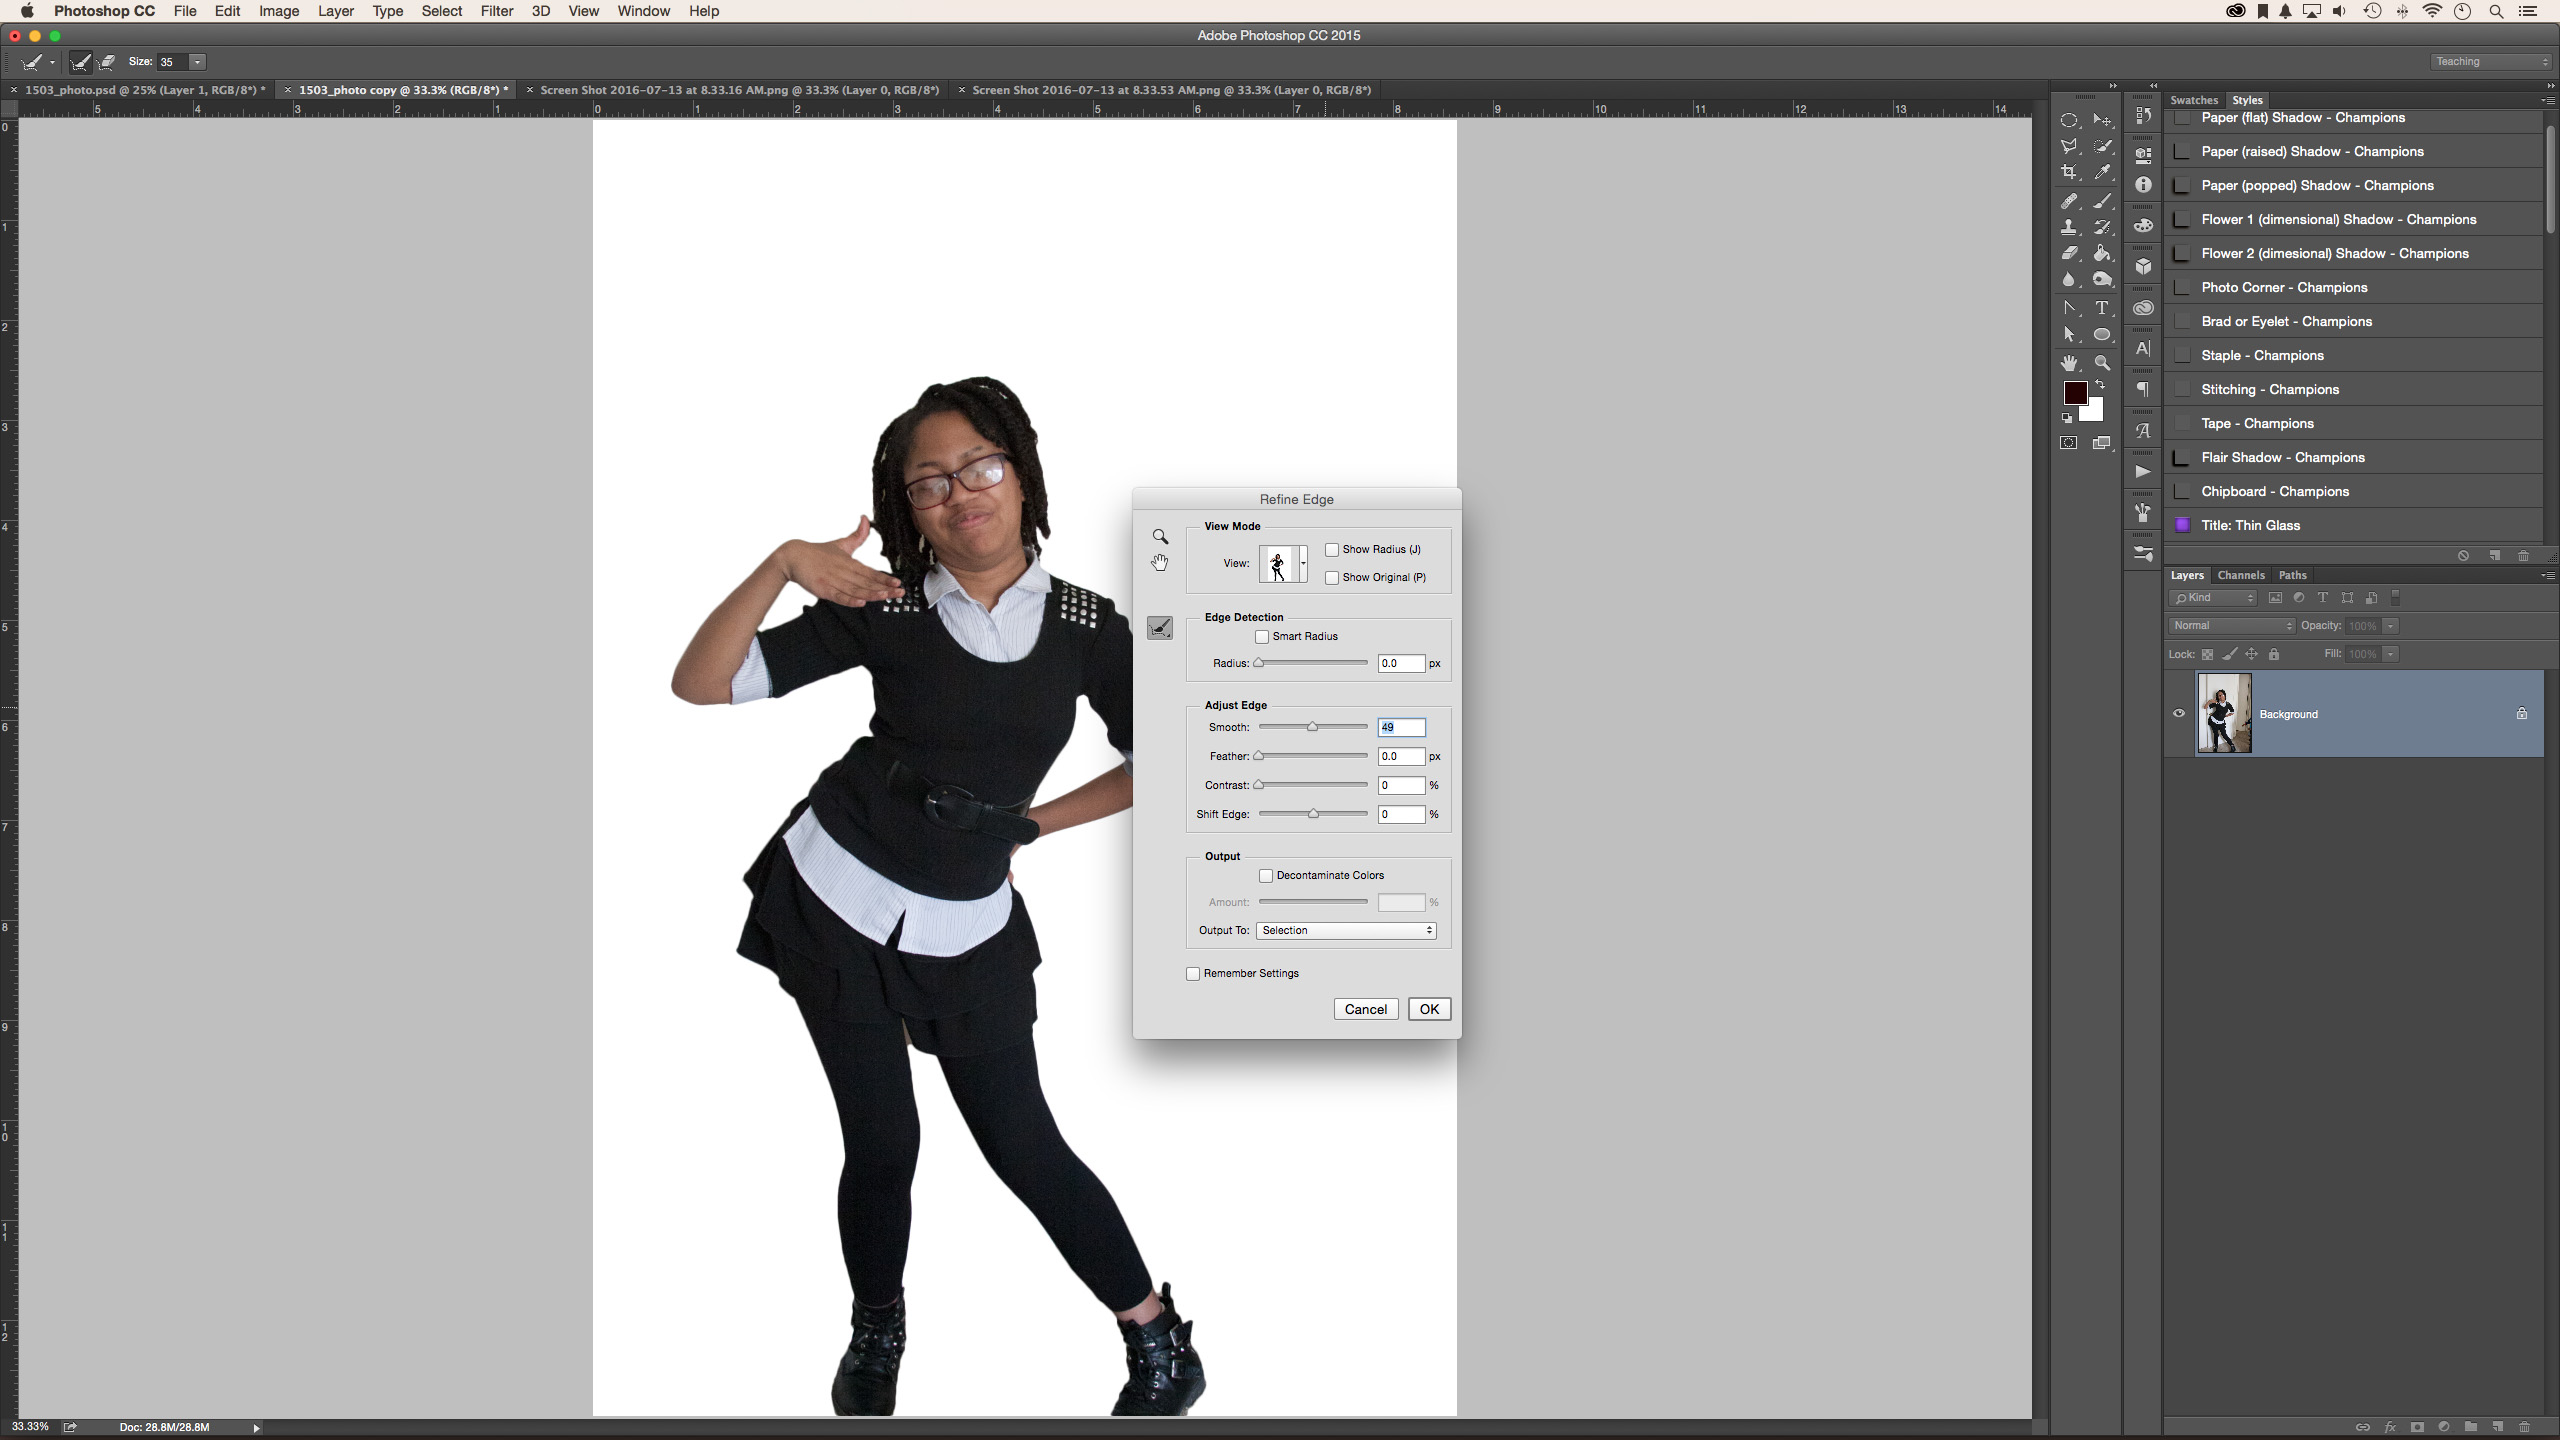
With the selection complete, right click within the marching ants and select ‘Refine Edge’ from the pop-up menu.

The Refine Edge dialogue can help you fine-tune your selection for better results. First, change the View Mode to ‘On White’ or any option that sharply contrasts with your selection. Doing so will help you see the parts of your edge that need the most help.
Under Adjust Edge, increase the Smooth value slider to soften the jagged edges of your selection. You may need to adjust additional sliders but smoothing should help the most. Click OK when finished.
Step 4: View Your Selection On a New Layer
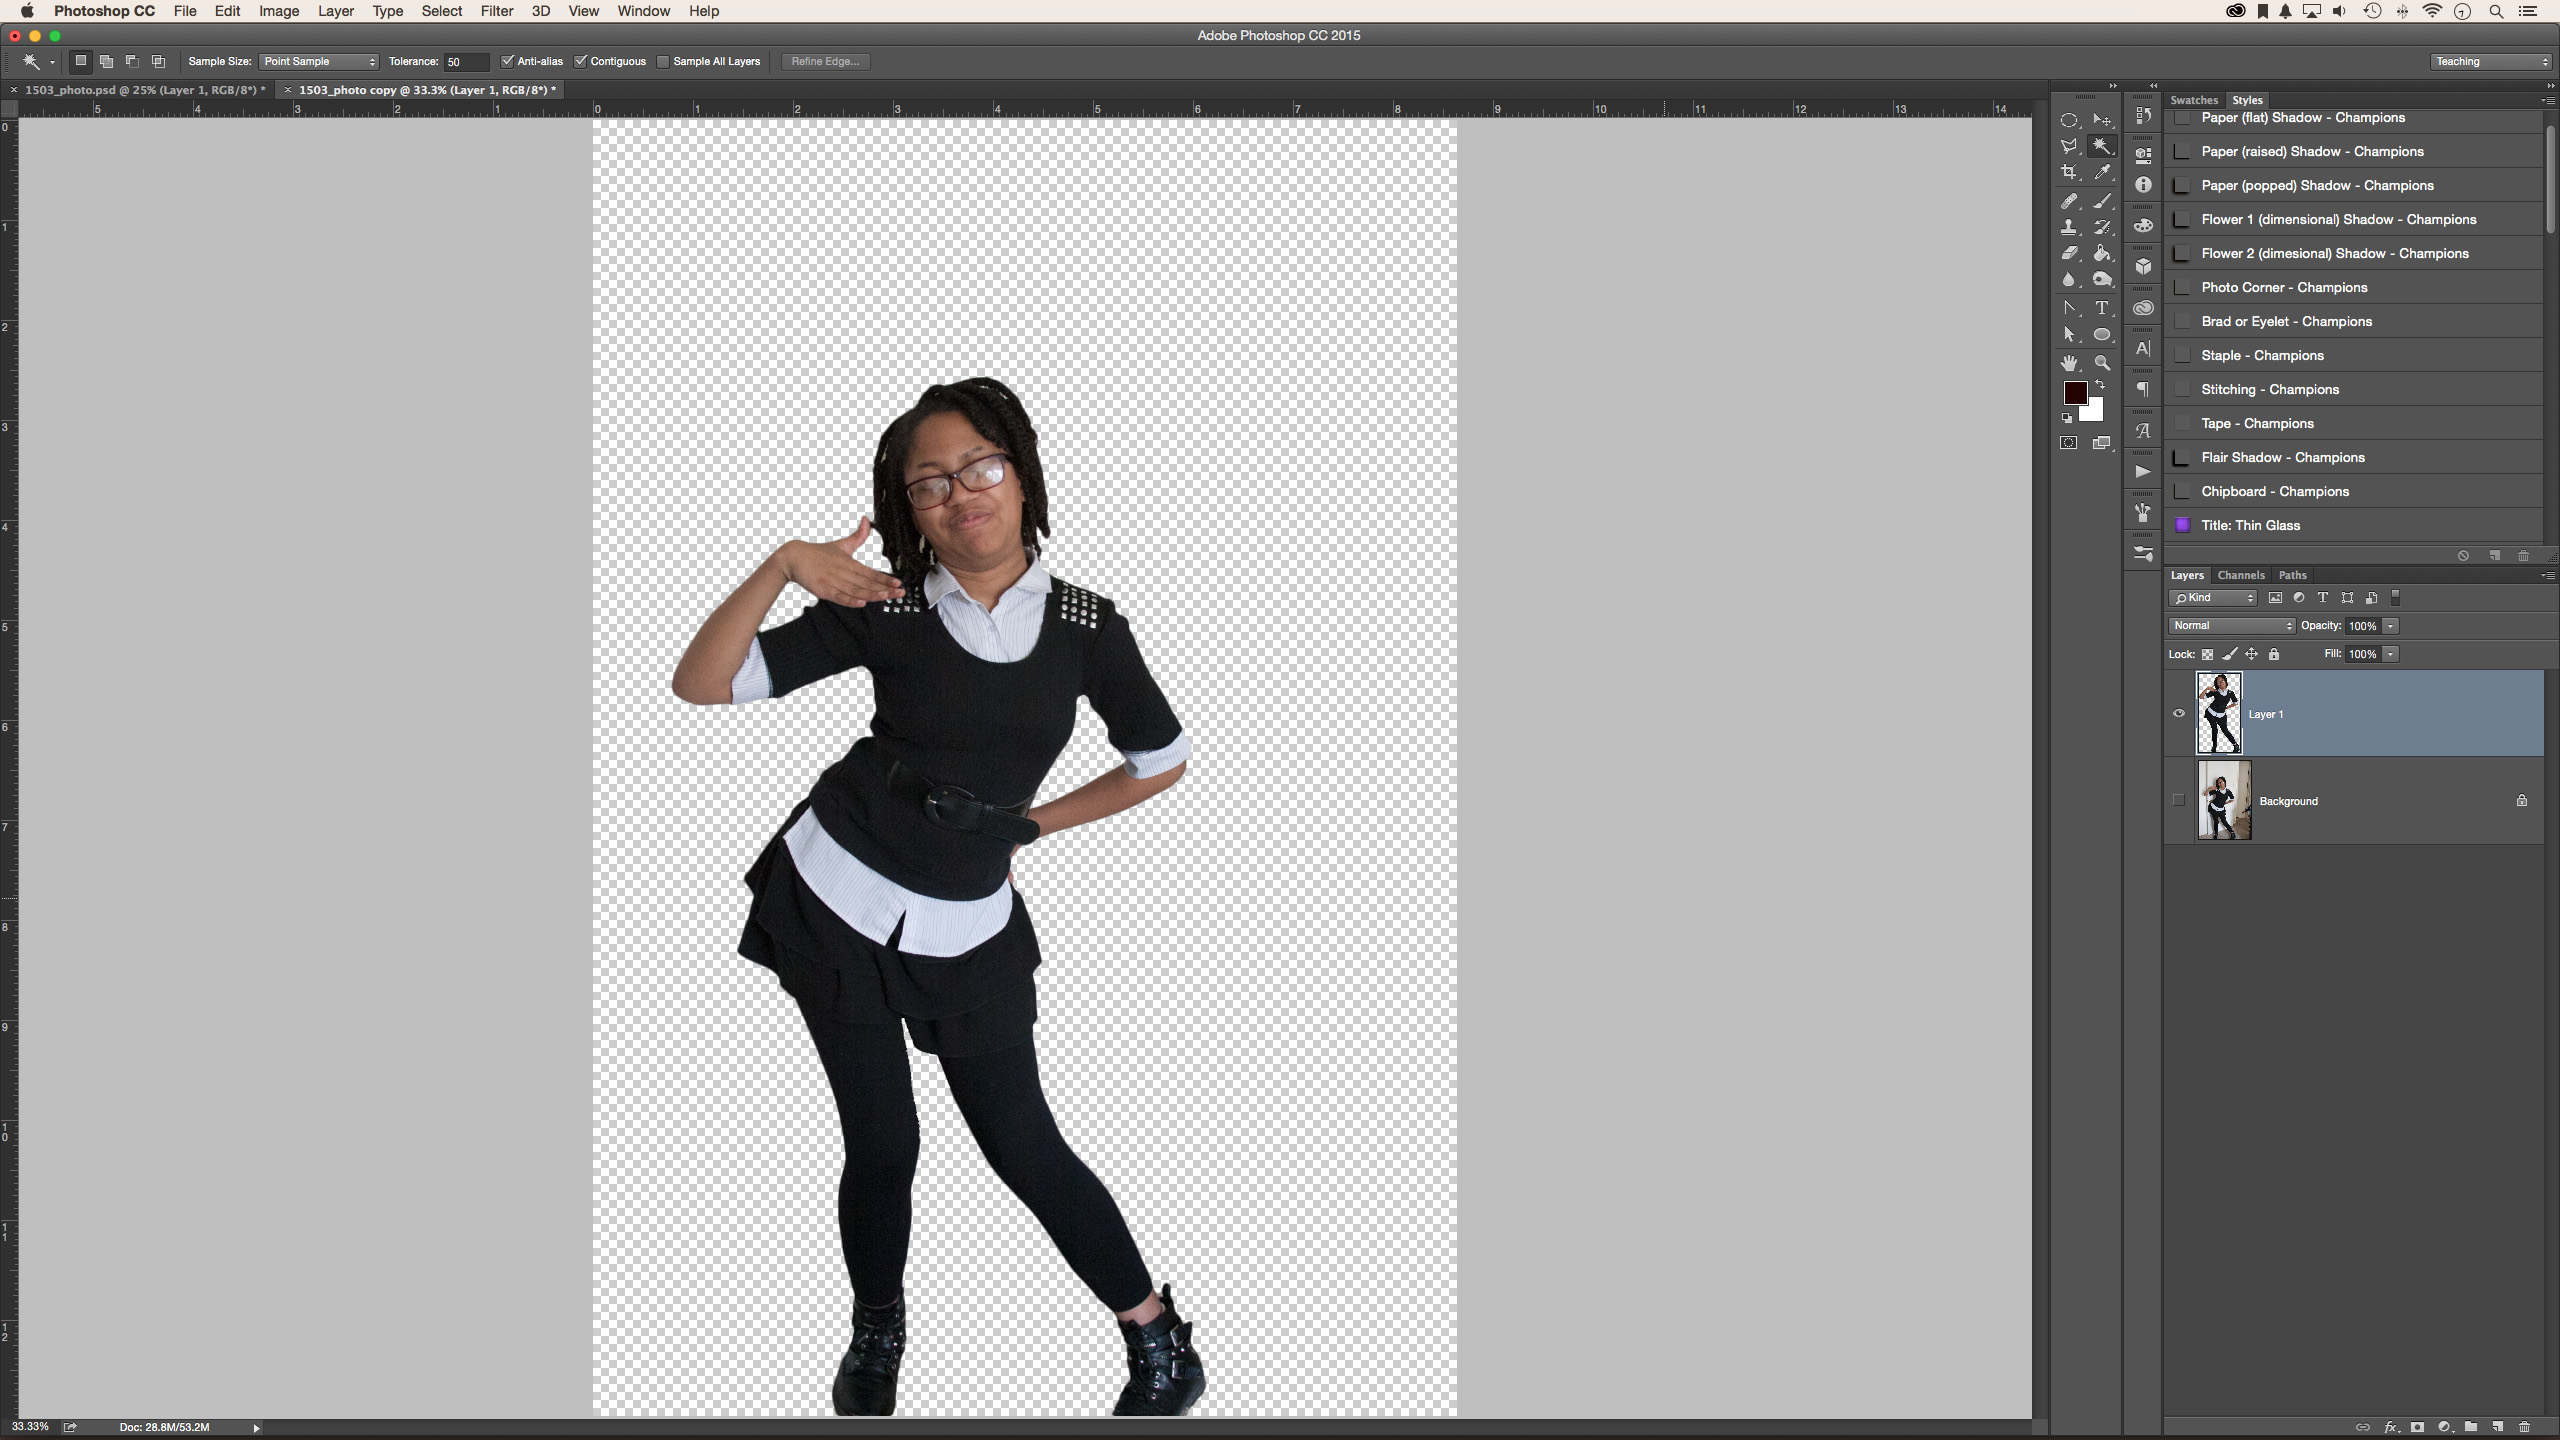
Your final step is to review your result. Right-click within your selection and choose Layer Via Copy. Your selection will assign itself to a new layer, sans background, without having edited your original photo.

Toggle off the visibility of your original background layer to view your completed piece against the original image.
Removing the background of an image is the first step for compositing success. With the background removed, you’re ready to create a new surrounding for your subject using your own creativity.
Ready to create new backgrounds within your photos? Check out Tiffany Tillman-Emanuel’s, Compositing for Digital graphics hub.
Comments